Lottie is a technology and file format for animating vector images. It was developed with the involvement of engineers at Airbnb.
Because Lottie animations do not lose image quality, they can help improve UI, create a stronger sense of immersion, and deliver richer experiences.
This article starts with an overview of Lottie, then introduces a quick way to create Lottie animations with the design tool Figma.
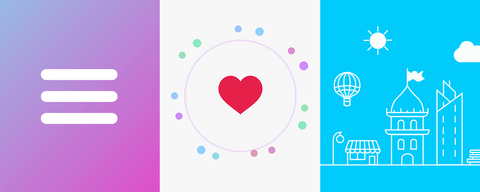
Lottie example:
What is Lottie?
Vector and raster images
First, let’s quickly review image formats. Image formats can be divided into two types: vector and raster. The difference between vector and raster images is explained in the article SVGで始めるマイクロインタラクション入門. In short, vector images keep a high resolution and do not blur when enlarged, while raster images do blur.
In other words, Lottie is a technology and file format for animating vector images.
Raster image animations, such as video formats and animated image formats, are covered in ウェブサイトに透過動画を埋め込む方法.
The Lottie file format
Lottie is described as a technology for animating vector images, but in practice it is a text file that contains object and animation data. In particular, the term usually refers to JSON files exported from the After Effects plugin Bodymovin, with the .json extension.
Because the contents are text, Lottie files are typically small compared with video files and animated images.
Lottie files with the .lottie extension
In addition to the .json format, Lottie can also use dotLottie, which has the .lottie extension. It has the following advantages.
- Multiple animations can be bundled into a single file
- Files are roughly one-tenth the size of JSON
- The format can be used across platforms, including web, iOS, and Android
- State Machines can be used to create interactive animations
Like .json Lottie files, .lottie files can play vector image animations. However, because the contents are compressed data, unlike JSON files they cannot be inspected or edited directly in a text editor.
How to create a Lottie animation
Lottie was originally created with the After Effects extension Bodymovin. With the LottieFiles plugin, tools such as Figma can now export animations as Lottie files.
Reference: LottieFiles integrations
This article explains how to create an animation with Figma’s prototyping feature and export it from LottieFiles.
Figma’s prototyping feature connects multiple frames and animates between them. If you set the transition type to Smart Animate, Figma interpolates the frames automatically. This makes it possible to create seamless animation similar to keyframe animation. Smart Animate is covered in FigmaのSmart Animateを活用したプロトタイプ入門.
1. Create the animation
Create the animation with the following points in mind. The details of the animation itself would make this article too long, so they are omitted.
- Set Transition to Smart Animate.
- Set every Interaction to After Delay. By connecting the ending frame back to the starting frame, you can create a looping animation.
- Check the supported features table for features that can be used in the animation.
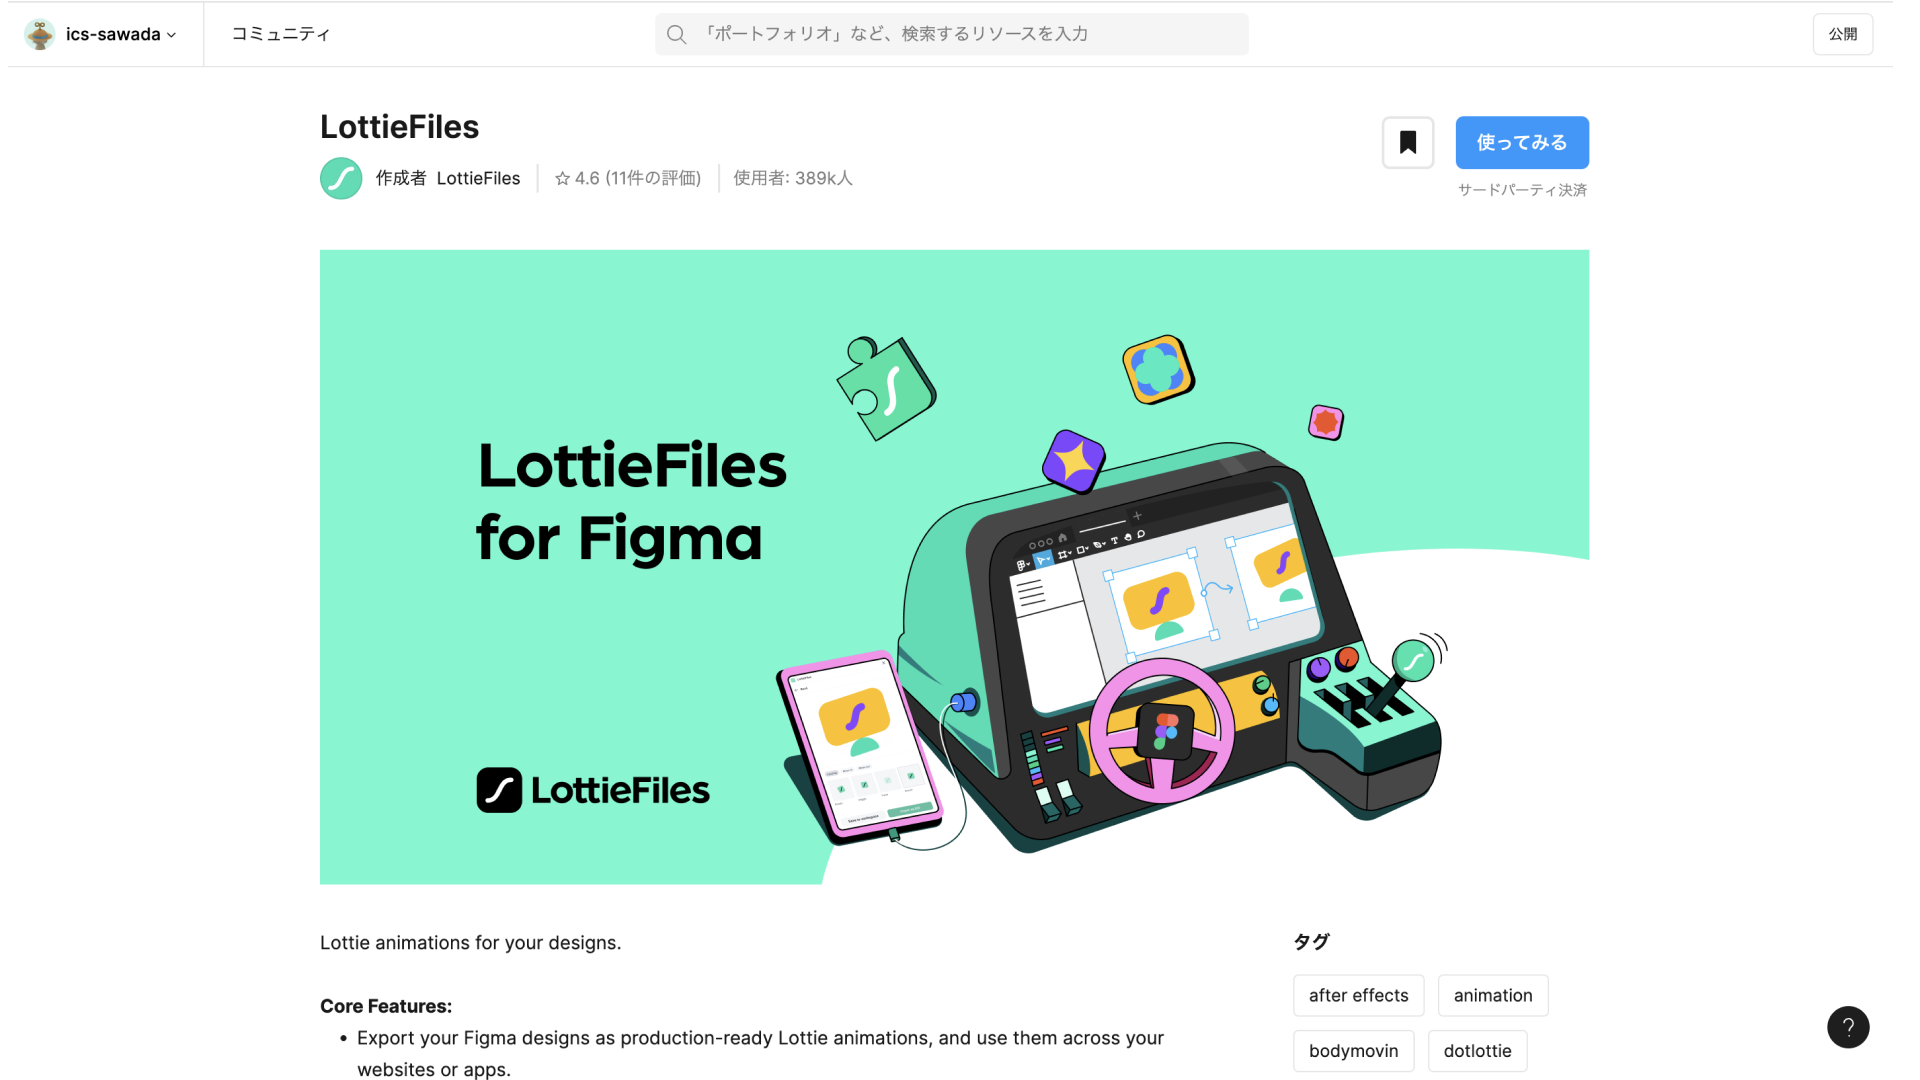
2. Search for LottieFiles in Figma Community and install the plugin
- LottieFiles plugin
- If you are not sure how to install plugins, see Figmaを使いこなせ! デザイナー必須のおすすめプラグイン15選.
- The text “Third-party payment” appears below the Try it out button, but the plugin can be used for free. Reference: Figma to Lottie - Help Center
Figma | LottieFiles plugin
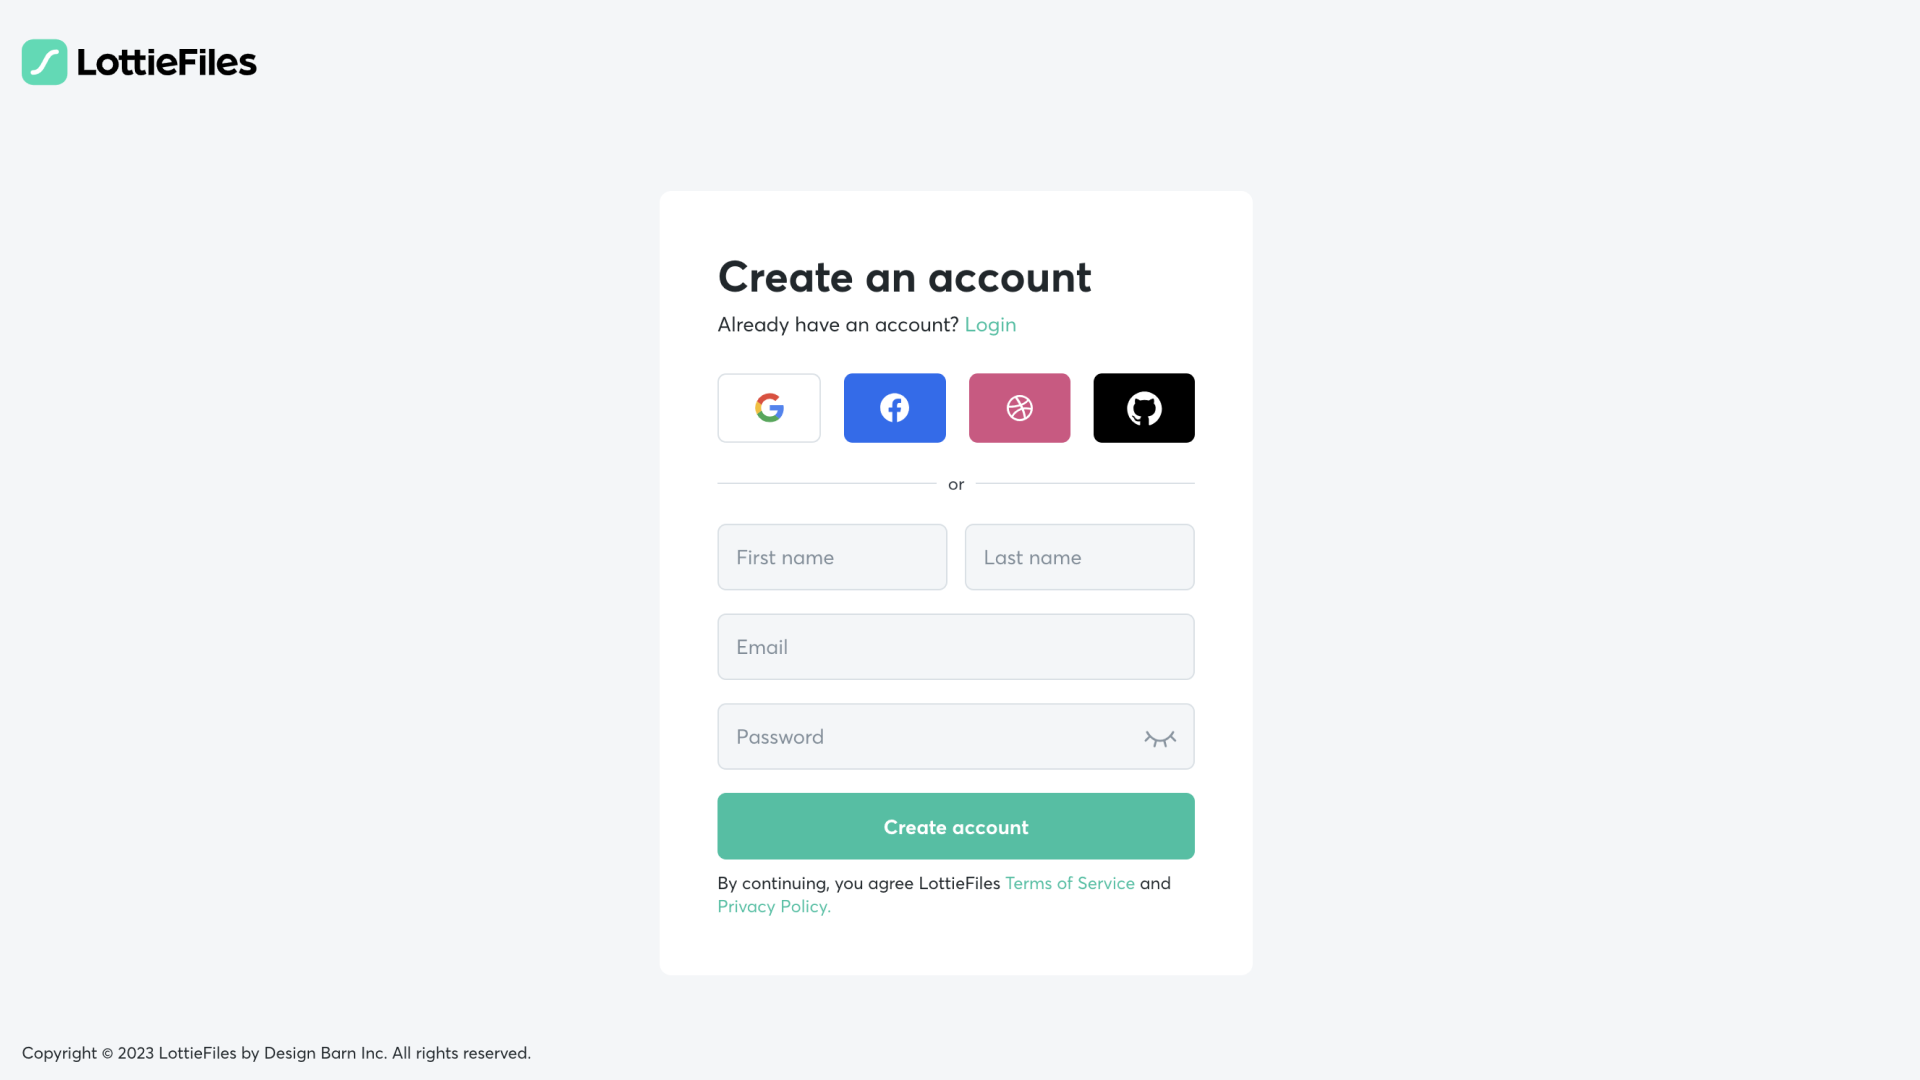
3. Log in or sign up for LottieFiles
- When you select LottieFiles from Plugins, you will be asked to log in or sign up. If you have not created an account, register for a LottieFiles account. If you are working in the Figma desktop app, this opens in your browser.
LottieFiles | Account registration screen. Registration is free.
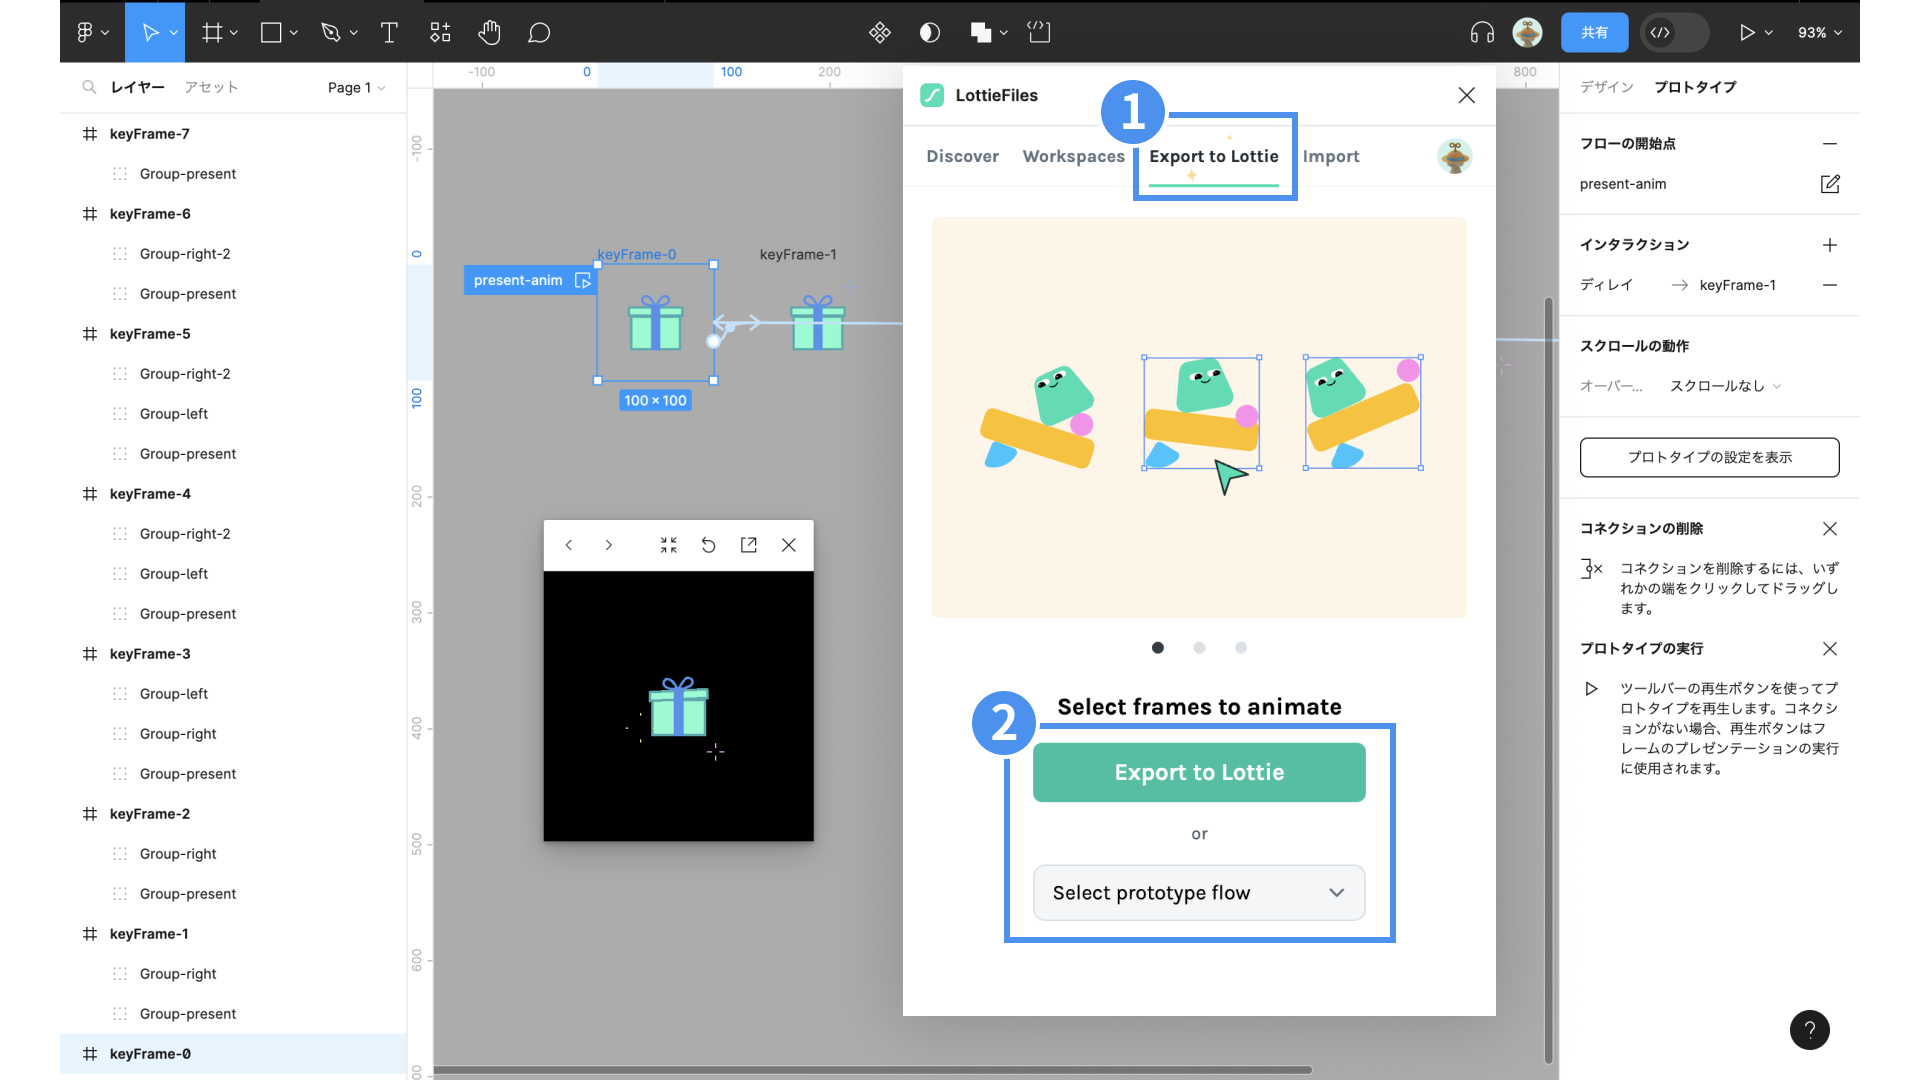
4. Export
-
Select LottieFiles from Plugins, then click the Export to Lottie tab.
-
Select the flow you want to export and click the Export to Lottie button, or choose the flow from Select prototype flow.
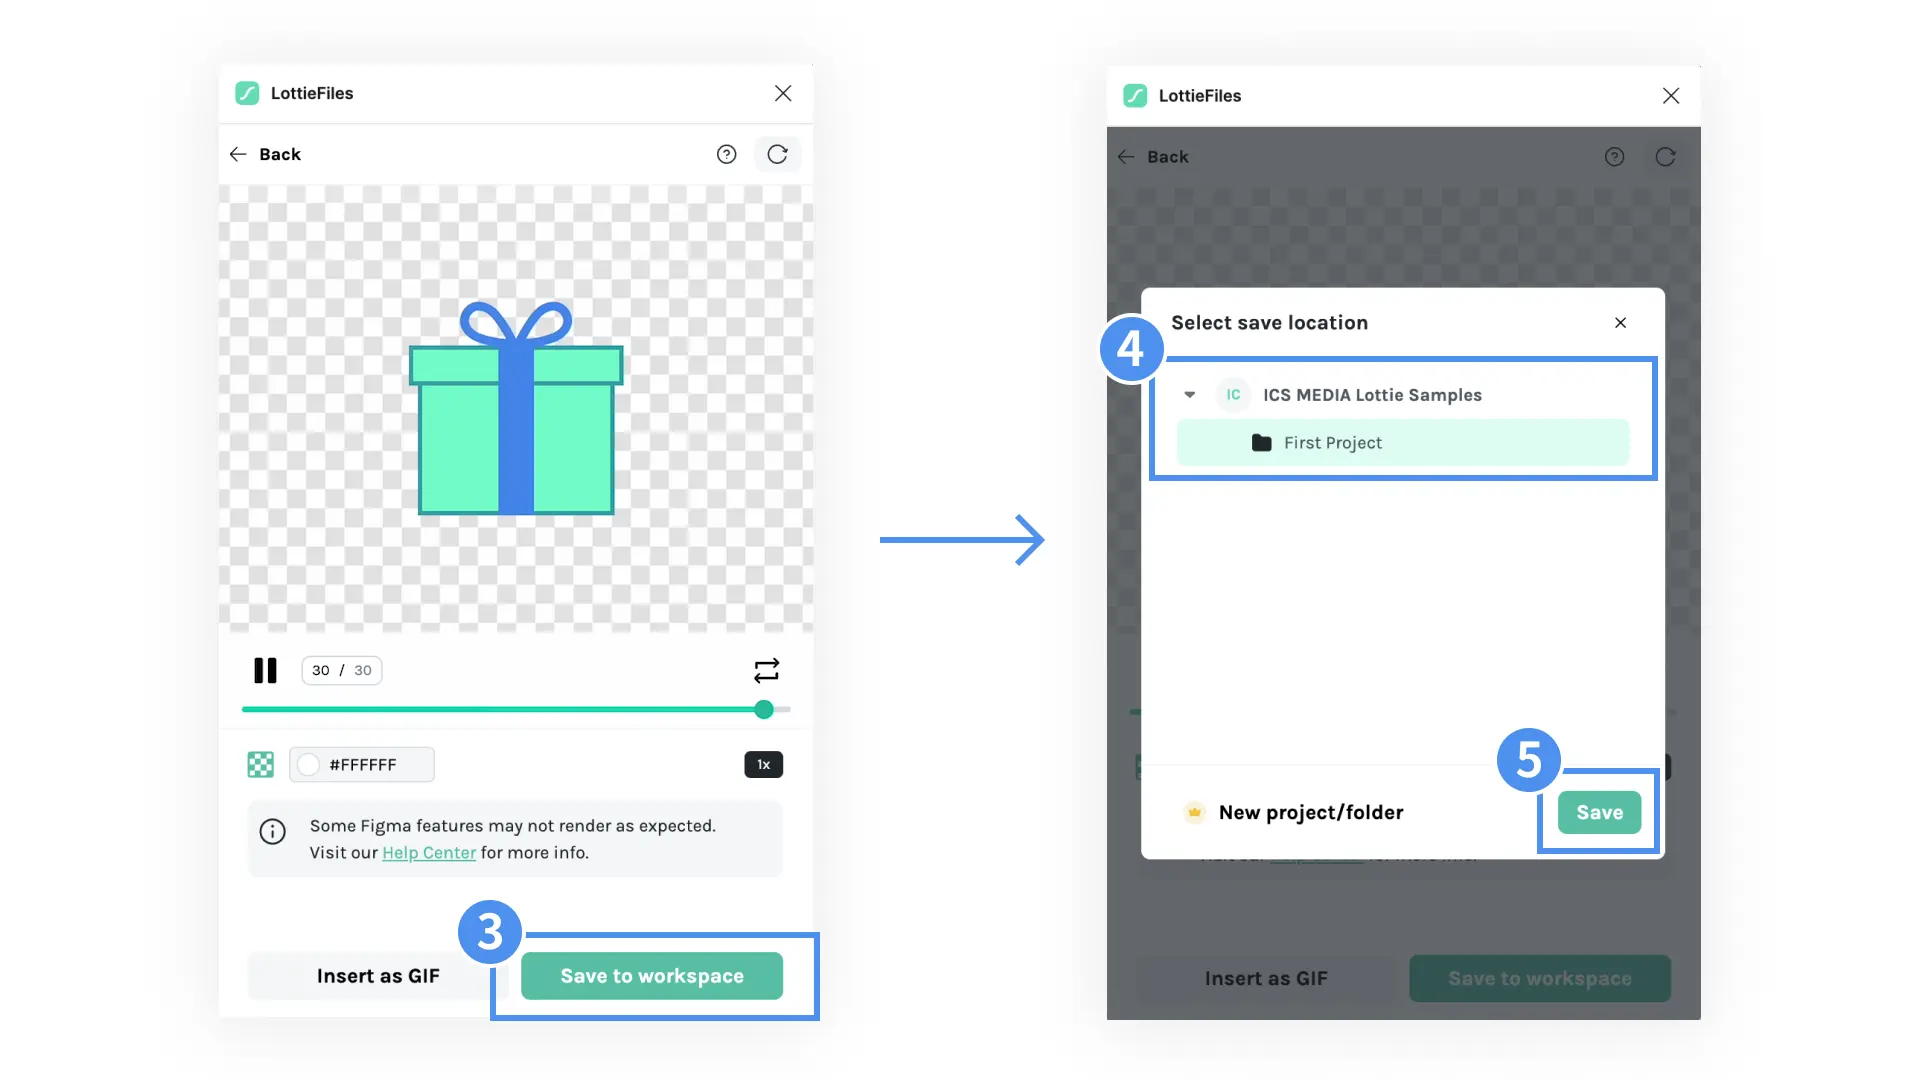
-
Click Save to workspace.
-
Select the destination folder for the upload.
-
Click Save. The file is uploaded as a private file.
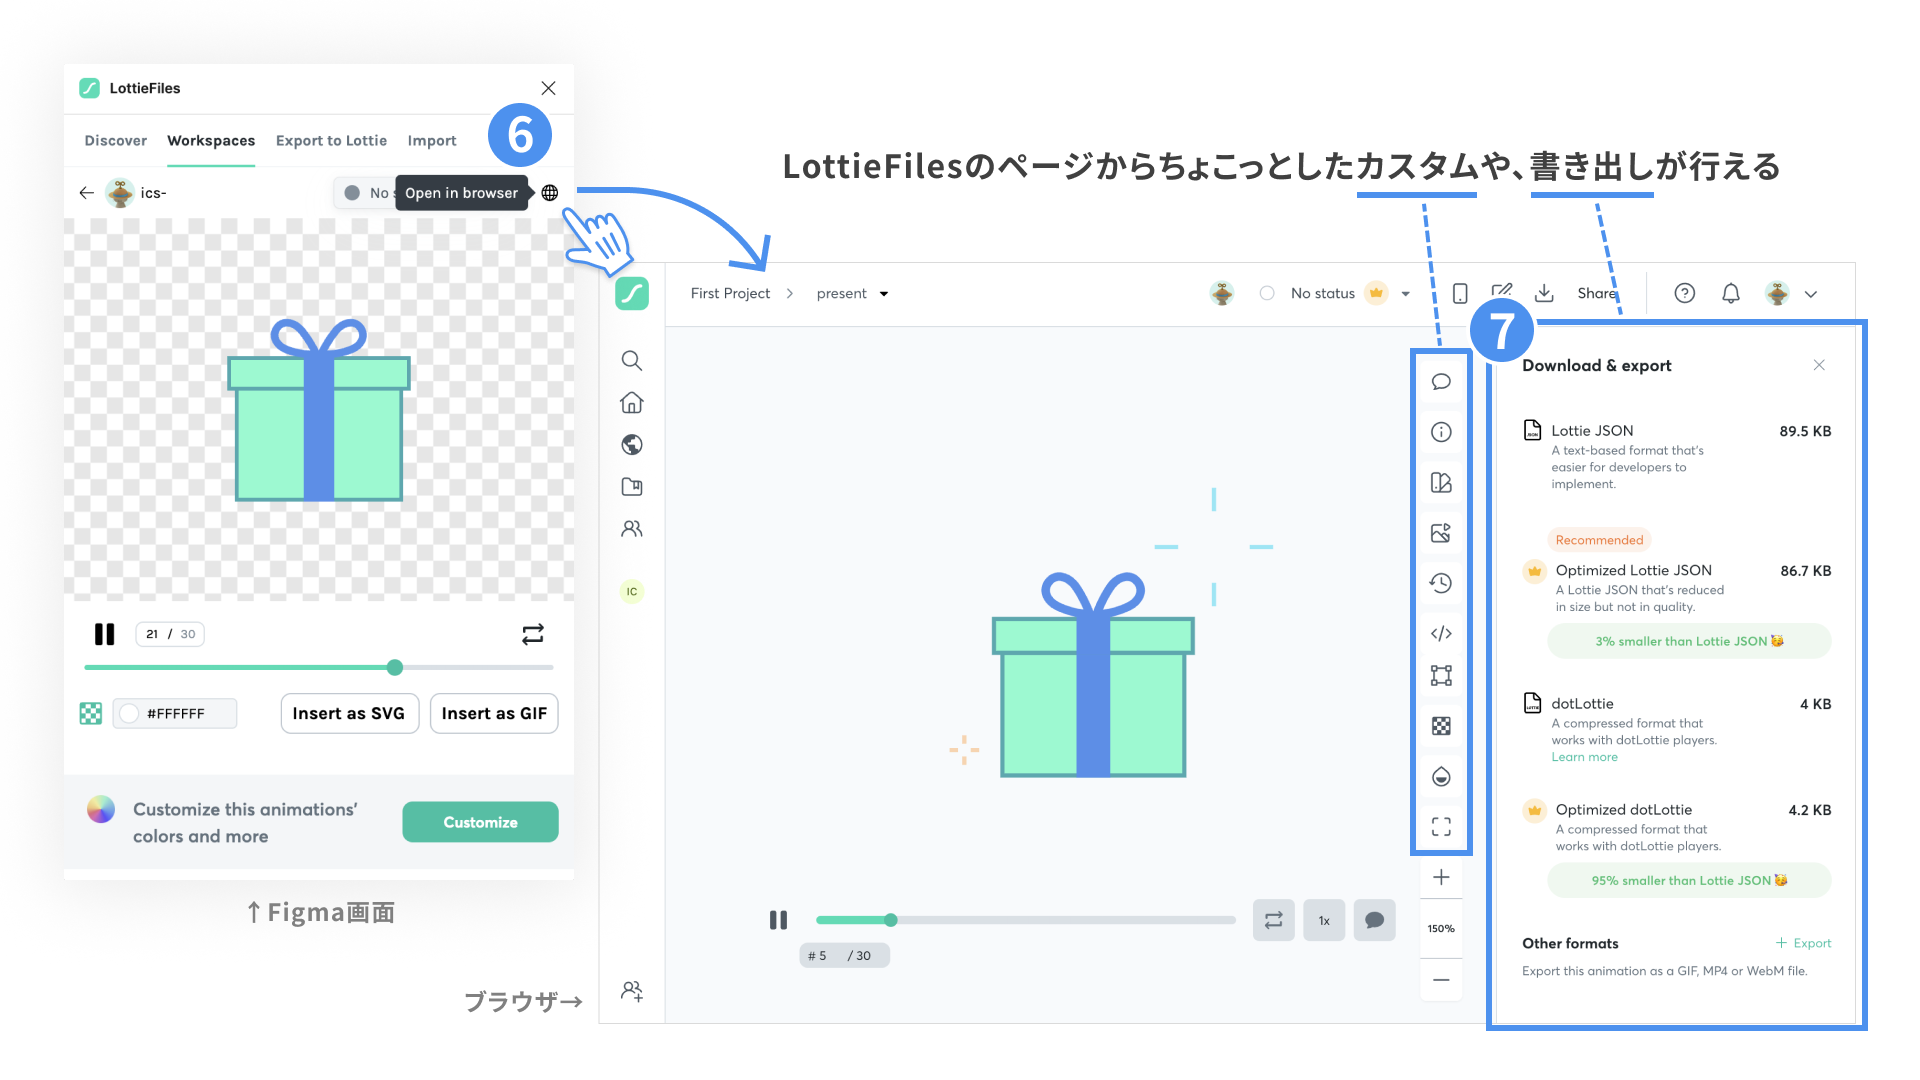
-
Click Open in browser and check the result in your browser.
-
Choose a file format in LottieFiles and download it to complete the export. You can also make simple customizations such as changing colors.
What is LottieFiles?
LottieFiles is something like a community where Lottie examples can be uploaded and existing examples can be used. It is also a service that provides simple editing, export features, plugins, and libraries needed for implementation.
Use uploaded animations
Examples uploaded to the LottieFiles community can generally be edited, downloaded, and used for free. If “Premium” appears near the download count, the work is published through IconScout and the link opens the IconScout website. Some Lottie animations have usage restrictions depending on the IconScout plan.
Publishing your own work
Your work will not be published unless you apply to publish it in the community. If you want to publish a Lottie animation, you can add tags and submit it for publication. It takes several hours for the animation to actually become public after submission, so wait patiently.
Use LottieFiles to preview animations
By uploading a work to LottieFiles, you can preview even private files on the web and in the mobile app.
LottieFiles also has sharing features. You can set viewing and editing permissions, issue limited-access links and QR codes, and invite only specific people by email.
Notes
The free Starter plan has limits on the number of uploads and the features that can be used.
For more information, see LottieFiles.
Conclusion
This article introduced Lottie, how to create Lottie animations with Figma, and how to export them with LottieFiles.
As shown by the Figma workflow introduced here, Lottie animations can be created with tools other than After Effects. This should make it easier to try Lottie in your own work.
The next article, Creating Lottie animations with After Effects, introduces how to create and export animations with After Effects.
References
Series
This article was originally published 2 years ago, and was maintained June 2026.