
Have you heard of AVIF, the AV1 Image File Format? For many years, most still images on websites used one of three formats: JPEG, GIF, or PNG. WebP later became widely adopted, and AVIF is now the format worth watching. Although major browsers can display AVIF, many assets are still handed off and published in conventional formats.
This article focuses on the features of AVIF and how to convert images to the format. It also compares AVIF with WebP and covers conversion workflows for both manual export and automated builds.
Note: This article was first published in October 2020. Browser support and other details were updated in July 2026.
WebP and AVIF for web images
For many years, choosing among JPEG, GIF, and PNG was standard practice for website images. JPEG was used for photos, PNG for logos and transparency, and GIF for animation.
Note: SVG is another major image format. Because SVG works very differently from raster formats such as JPEG and PNG and is used for different purposes, it is outside the scope of this article.
For websites today, the main formats to consider are WebP, which has become an established replacement for JPEG, GIF, and PNG, and AVIF, which can often reduce file sizes even further.
WebP can cover the roles of JPEG, GIF, and PNG in a single format
WebP makes it easier to consolidate formats that were previously selected according to an image’s purpose and characteristics. Its main features include:
- High compression efficiency: files are 25% to 34% smaller than JPEG at comparable visual quality, making WebP a replacement for JPEG
- Lossy compression combined with transparent animation: even transparent animations can trade some image quality for a smaller file size, making WebP a replacement for GIF and PNG
- Support for lossless compression, making WebP a replacement for GIF and PNG
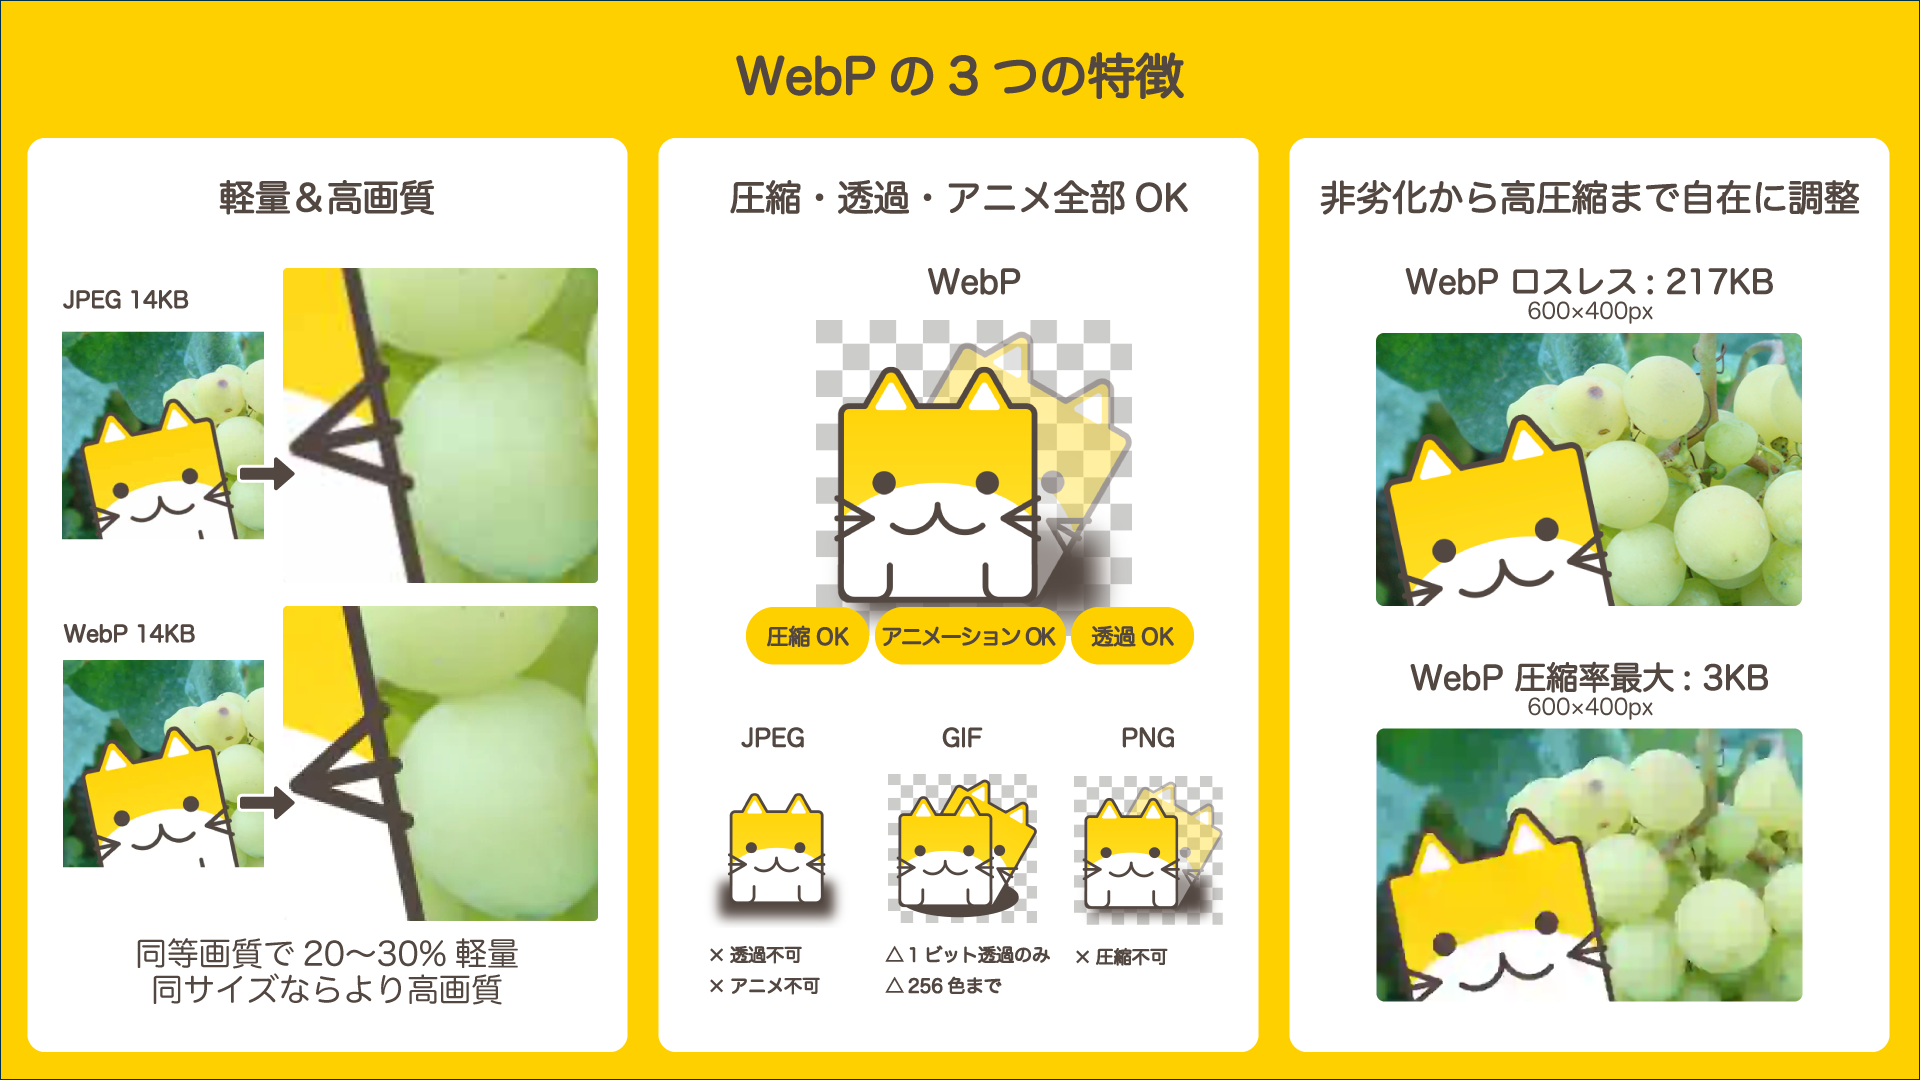
The earlier Japanese-language article WebP画像を作成できるアプリ「WebP画像を作る君」を公開 explains WebP compression settings and compares image quality. See it for details, then try the settings with your own images.
AVIF can produce even smaller files at a similar visual quality
WebP made it possible to consolidate many JPEG, GIF, and PNG use cases into a single format. When reducing delivery size even further is a priority, AVIF is a strong option. AVIF is supported by all major browsers, including Chrome, Firefox, Safari, and Edge. Its main features include:
- Support for a wide range of color spaces and chroma subsampling modes
- Higher visual quality and smaller files than WebP in many cases: at the same file size, AVIF can retain more detail and avoid the block artifacts typical of JPEG
- Developed collaboratively by the Alliance for Open Media (AOMedia), whose members include Amazon, Netflix, Google, Microsoft, Mozilla, and many other companies; Facebook and Apple joined later
You can convert images to AVIF with Photoshop or ffmpeg, as described later in this article. In October 2025, AV1 Image File Format (AVIF) v1.2.0 was published. Previewing WebP and AVIF files at the operating-system level was once inconvenient, but support has improved in current versions of macOS and Windows 11.
JPEG XL is another next-generation image format. However, browser support and website adoption have not progressed as far as they have for AVIF and WebP.
Why are JPEG and PNG still so common?
Even when browsers support newer formats, continuing to use JPEG and PNG is not unusual. Several factors contribute to this: CMS platforms and templates often still default to conventional formats, teams may not yet have agreed on how to handle AVIF, and the delayed introduction of WebP and AVIF support in Safari led many teams to adopt a wait-and-see approach that persists today.
PNG and JPEG are familiar, easy to preview, and straightforward to swap out. Because the size of published images directly affects page-loading performance, it is useful to separate the working format from the delivery format. The production workflow can continue to use JPEG or PNG, while images are converted to AVIF only when they are published.
When to create AVIF files
AVIF files can be created at three main stages of the workflow. The person responsible, the tools used, and the tradeoffs vary depending on when conversion takes place. The following sections examine each option.
A. Have designers export them during the design process
The simplest option is to include AVIF or WebP files in the asset package delivered by the designer.
Adobe Photoshop has supported AVIF export since the June 2025 release. WebP has been supported as a standard save format since version 23.2, released in February 2022. Both formats are available from File > Save a Copy. Note that neither format can be selected in Export As or Save for Web (Legacy). For details on the differences between export methods and the steps involved, see Best Photoshop export options for AVIF, WebP, and PNG.
Images whose size and quality need close attention, such as hero images, are well suited to manual AVIF export by a designer who can inspect the result.
It is also possible to export PNG files first and batch-convert them to WebP or AVIF with another tool, but this workflow is not recommended in most cases. The main advantage of using Photoshop is that a designer can balance image quality and file size while producing the final asset. For batch conversion, it is more efficient to have an engineer own the process and incorporate it into the development workflow using one of the methods described below.
Saving every image individually takes time and can easily introduce mistakes. This approach is best reserved for assets such as a homepage hero image, where file size and visual quality must be tuned precisely.
B. Have engineers generate them during the build
For automated conversion of a large number of images, an engineer should usually generate the files in bulk during the build process.
For command-line conversion, FFmpeg is a versatile choice. The examples below require a build of FFmpeg that includes the libaom-av1 and libwebp encoders. Run ffmpeg -encoders to check which encoders are available. The following command converts an image to AVIF:
ffmpeg -i source.png -c:v libaom-av1 -still-picture 1 output.avif
WebP conversion works in the same way. Specify -c:v libwebp:
ffmpeg -i source.png -c:v libwebp output.webp
You can also adjust settings such as compression quality. See the libwebp section of the official FFmpeg codec documentation for descriptions of the options and their supported value ranges.
ffmpeg -i source.png -c:v libwebp -quality 70 -preset photo output.webp
Many current web projects use Vite to structure the build process. For an overview of Vite itself, see Vite guide - HTML, TypeScript, React, Vue, and Tailwind CSS.
Many npm packages can convert and compress images, making it straightforward to generate AVIF and WebP files during a build. The following vite.config.js example generates both formats from JPEG and PNG files. It demonstrates two output formats, but a project can generate only one of them when appropriate.
vite.config.js
import { defineConfig } from "vite";
import { generateFormats } from "./plugins/generate-formats.js";

export default defineConfig({
  plugins: [
    generateFormats({
      srcDir: "public/img",
      webp: { quality: 80 },
      avif: { quality: 50 },
    }),
  ],
});
plugins/generate-formats.js (excerpt)
import { readdirSync, readFileSync, writeFileSync, mkdirSync } from "node:fs";
import { join, parse } from "node:path";
import sharp from "sharp";

export function generateFormats(options = {}) {
  const { srcDir = "public/img", webp = { quality: 80 }, avif = { quality: 50 } } = options;

  return {
    name: "generate-formats",
    apply: "build",
    async closeBundle() {
      const inputDir = join(process.cwd(), srcDir);
      const outputDir = join(process.cwd(), "dist", "img");
      mkdirSync(outputDir, { recursive: true });

      const files = readdirSync(inputDir).filter((file) => /\.(jpe?g|png)$/i.test(file));

      await Promise.all(
        files.map(async (file) => {
          const inputPath = join(inputDir, file);
          const { name } = parse(file);
          const buffer = readFileSync(inputPath);

          writeFileSync(join(outputDir, file), buffer);
          await sharp(buffer).webp(webp).toFile(join(outputDir, `${name}.webp`));
          await sharp(buffer).avif(avif).toFile(join(outputDir, `${name}.avif`));
        }),
      );
    },
  };
}
This method can process large numbers of images at once, but it applies the same settings, such as quality, to every image. The quality values used by WebP and AVIF are not directly comparable, so inspect the converted images and adjust the settings based on the actual results.
AVIF encoding can take considerable time. When converting a large number of images, WebP’s faster encoding may make it a better choice.
Whenever possible, convert from PNG or another high-quality source. For logos and illustrations, use PNG. For photographs, use a high-quality JPEG or another file that is as close to the original source as possible. Conversion is still possible when JPEG is the only available source, but repeatedly applying different lossy compression methods can introduce generation loss. Inspect both image quality and file size after conversion before deciding whether to use the result.
C. Generate them on demand on the server
The build-time approach in section B is convenient and reliable for front-end engineers, but it cannot handle images that are added dynamically. Server-side processing is required when user-uploaded images or images added and replaced through a CMS after launch must also be converted to AVIF.
An image-delivery service such as Cloudflare Images is a practical option. The requested format, dimensions, and quality can be specified in the delivery URL, allowing automatic AVIF conversion and CDN caching to be handled together.
Image conversion is computationally expensive, so previously converted images must be served from a cache. When building the system in-house, configure the Cache-Control header and consider adding a CDN or dedicated cache server. A custom implementation introduces substantially more operational concerns, including cloud costs and incident response. The tradeoff is greater flexibility after launch, including control over image formats and quality settings.
In general, server-side processing becomes more important as a website grows and its content becomes more dynamic. The point at which this approach should be adopted depends on the team’s skills, operational burden, and costs.
Build high-performance websites with WebP and AVIF
There is no need to stop using familiar JPEG and PNG files immediately. Start with a single image and test AVIF by exporting it from Photoshop or using the build configuration shown above.
This article introduced three points in the workflow where AVIF can be created: manual export by a designer, batch conversion during a build, and on-demand generation on the server. The practical approach is to start with whichever method is easiest to adopt.
Fast delivery of high-quality images directly improves the web experience. Optimize image delivery to build faster websites.