
The JavaScript library GSAP is useful for creating motion on websites. Part 1 explained the basics of using GSAP.
Part 2 introduces effects built with timelines.
Timeline
A timeline is an important feature that you will definitely use when creating advanced effects with GSAP.
Because it lets you build complex motion in chronological order, it is convenient for creating and managing many tweens.
Official tutorial video. Build an entrance animation with just five lines of code.
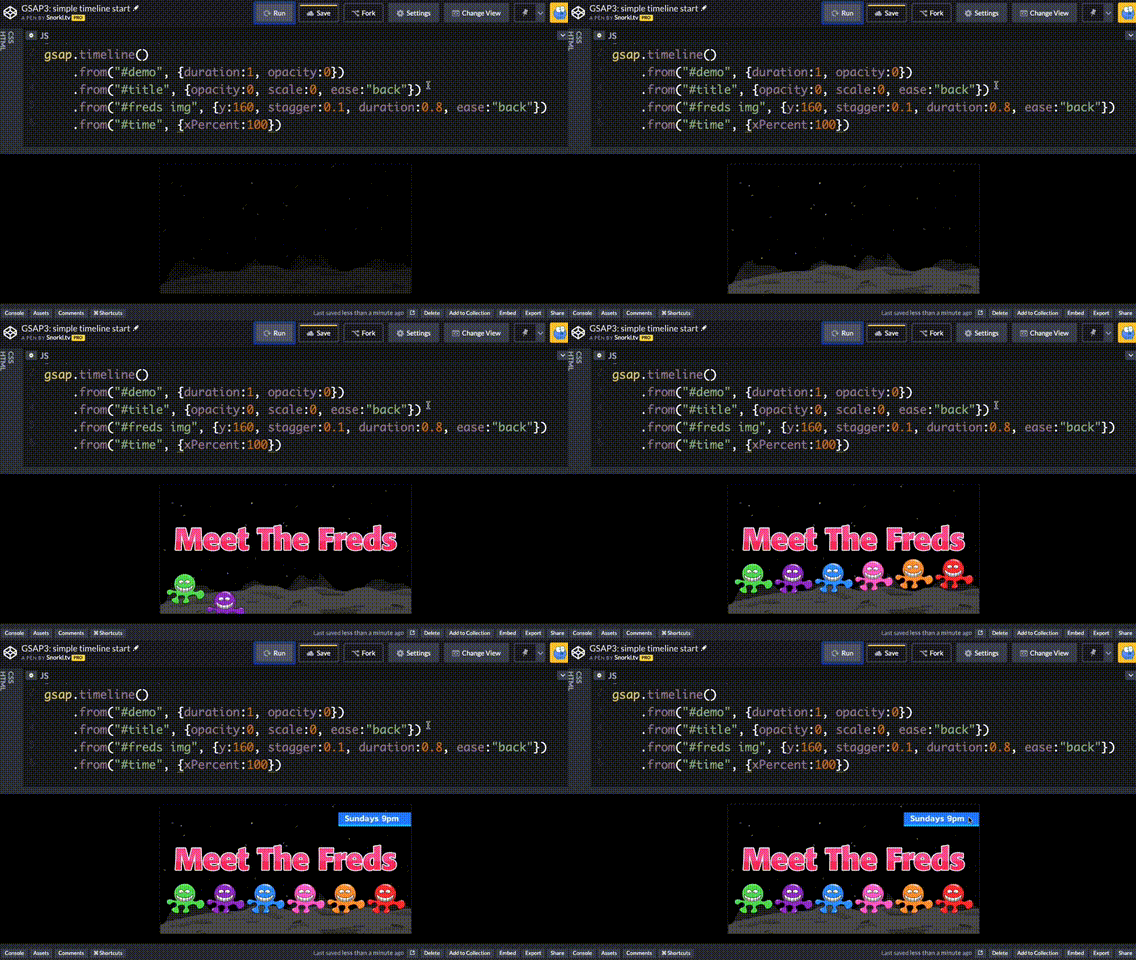
To use it, create an instance with gsap.timeline(), and then add gsap.to() tweens to the timeline with the add() method.
const tl = gsap.timeline({ repeat: -1, repeatDelay: 0.5 }); // initialize first
// add the elements you want to animate one after another
tl.add(gsap.to(".rect", { x: 100, duration: 1 })); // move horizontally
tl.add(gsap.to(".rect", { y: 100, duration: 1 })); // move vertically
tl.add(gsap.to(".rect", { rotation: 360, duration: 1 })); // rotate
tl.add(gsap.to(".rect", { x: 0, duration: 1 })); // move horizontally
tl.add(gsap.to(".rect", { y: 0, duration: 1 })); // move vertically
The timeline’s to() method is a shortcut for add(gsap.to()), so you can also write it like this.
const tl = gsap.timeline({ repeat: -1, repeatDelay: 0.5 }); // initialize first
// add the elements you want to animate one after another
tl.to(".rect", { x: 100, duration: 1 }); // move horizontally
tl.to(".rect", { y: 100, duration: 1 }); // move vertically
tl.to(".rect", { rotation: 360, duration: 1 }); // rotate
tl.to(".rect", { x: 0, duration: 1 }); // move horizontally
tl.to(".rect", { y: 0, duration: 1 }); // move vertically
You can also write it as a chain of methods. In every case, the only difference is the style of writing; the execution result is the same.
gsap
  .timeline({ repeat: -1, repeatDelay: 0.5 }) // initialize first
  // add the elements you want to animate one after another
  .to(".rect", { x: 100, duration: 1 }) // move horizontally
  .to(".rect", { y: 100, duration: 1 }) // move vertically
  .to(".rect", { rotation: 360, duration: 1 }) // rotate
  .to(".rect", { x: 0, duration: 1 }) // move horizontally
  .to(".rect", { y: 0, duration: 1 }); // move vertically
Methods
The following are the main methods used when creating timelines.
| Method | Description |
|---|---|
| add() | Adds a tween, timeline, callback, or label to the timeline. |
| to() | Adds a gsap.to() tween to the end of the timeline. |
| from() | Adds a gsap.from() tween to the end of the timeline. |
| fromTo() | Adds a gsap.fromTo() tween to the end of the timeline. |
| set() | Sets values at a specific timing. |
| call() | Calls a function at a specific timing. |
Timing
If you connect motion strictly in series, it tends to become stiff, step-by-step motion. To make the presentation feel smoother, you often overlap motions. In the following example, the first half uses step-by-step motion, and the second half overlaps the animations.
gsap
  .timeline({ repeat: -1, repeatDelay: 0.5 })
  // 🌟step-by-step motion
  .set("h1", { textContent: "show" })
  .from(".rect1", { y: -32, opacity: 0, duration: 0.5 })
  .from(".rect2", { y: 32, opacity: 0, duration: 0.5 })
  .from(".rect3", { y: -32, opacity: 0, duration: 0.5 })
  .from(".rect4", { y: 32, opacity: 0, duration: 0.5 })
  .from(".rect5", { y: -32, opacity: 0, duration: 0.5 })
  .from(".rect6", { y: 32, opacity: 0, duration: 0.5 })
  // 🌟from here, the motions overlap
  .set("h1", { textContent: "hide" }, "+=1") // wait 1 second
  .to(".rect1", { y: -32, opacity: 0, duration: 0.5 }, "+=0.5") // wait 0.5 seconds
  .to(".rect2", { y: 32, opacity: 0, duration: 0.5 }, "-=0.4") // start 0.4 seconds earlier
  .to(".rect3", { y: -32, opacity: 0, duration: 0.5 }, "-=0.4")
  .to(".rect4", { y: 32, opacity: 0, duration: 0.5 }, "-=0.4")
  .to(".rect5", { y: -32, opacity: 0, duration: 0.5 }, "-=0.4")
  .to(".rect6", { y: 32, opacity: 0, duration: 0.5 }, "-=0.4");
Timeline timing can be specified with the third argument, position, of the to() or from() methods.
If you pass a number, it specifies an absolute time from the beginning of the timeline. "+=2" places the animation 2 seconds after the end of the timeline, while "-=2" places it 2 seconds before the end.
When a percentage follows += or -=, it is based on the total duration of the animation being inserted. For example, "-=50%" overlaps the end of the timeline by 50% of the inserted animation’s total duration. To place it at the 50% point of the previously added animation, use "<50%".
Values you can specify for timing besides numbers:
| Value | Example | Description | Frequency |
|---|---|---|---|
number |
1 |
Start this many seconds from the beginning of the timeline. | ★ |
+=number |
+=1 |
Start this many seconds after the end of the timeline. | ★ |
-=number |
-=1 |
Start this many seconds before the end of the timeline. | ★ |
< |
< |
Start when the most recently added animation starts. | ★ |
<number |
<1 |
Start this many seconds after the most recently added animation starts. | |
> |
> |
Start when the most recently added animation ends. | |
>number |
>1 |
Start this many seconds after the most recently added animation ends. |
Personally, I recommend mastering the ones marked with “★” (I do not use the others very often myself).
There are many other ways to specify positions. See the official guide for details:
Nesting
Timelines can also be nested. GSAP timelines tend to become long, so it is a good idea to organize your code by using nesting effectively.
Use the gsap.timeline.add() method to add another timeline instance into a timeline.
// function that creates a timeline
function createChildTimeline(target) {
  const tl = gsap.timeline();
  tl.to(target, { x: 100, duration: 1 });
  return tl; // return the timeline
}

// create the root timeline
const rootTl = gsap
  .timeline()
  .add(createChildTimeline(".a")) // add a child
  .add(createChildTimeline(".b")); // add a child
This covers the key timeline features.
Advanced control
The features from this point on are aimed at intermediate and advanced users. Beginners can skip them because they are not essential.
seek()
You can seek a GSAP timeline with the timeline.seek() method. In general, “seek” means moving the playback position to any desired point in a playing video or animation.
In the following sample, an input element is used as a seek bar. Move the seek bar and confirm that you can freely move back and forth through the timeline’s time. You can also change the playback speed.
The demo is built interactively with Vue.js.
The following methods are related to time. time(), duration(), and progress() are all provided as both getters and setters.
| Method | Description |
|---|---|
| time() | Gets or sets the local position of the playhead (basically the current time; repeats and repeatDelay are not included). |
| duration() | Gets the duration (in seconds) of the timeline. When used as a setter, it adjusts the timeline’s timeScale so that it fits within the specified duration. |
| progress() | Gets or sets the timeline’s progress. It is a value from 0 to 1, representing the position of the virtual playhead (0 is the start, 0.5 is halfway, and 1 is complete). |
| seek() | Jumps to a specific time. |
tweenTo()
You can apply a tween to a timeline’s time axis. Use the tweenTo() method. It can be useful as a staging technique for timelines that control multiple objects.
// Apply to a grid
const tl = gsap
  .timeline()
  .from(".rect", {
    scale: 0,
    rotation: -360,
    duration: 0.5,
    stagger: {
      each: 0.1,
      grid: "auto", // Start in a grid pattern
    },
  })
  .addLabel("complete"); // Add a label

// Tween the time axis
tl.tweenTo("complete", {
  duration: 4,
  // Specify easing for the time axis
  ease: "slow(0.4, 0.9, false)",
  // Note: slow requires the EasePack plugin
});
| Method | Description |
|---|---|
| addLabel() | Adds a label to the timeline so that important positions/times can be marked easily. |
| tweenTo() | Creates a linear tween that scrubs the playhead to a specific time and then stops. |
timeScale()
Using a timeline’s timeScale() method, you can stretch or compress its playback time. By using time scaling, you can make only part of the timeline play in slow motion. There are various names for this kind of effect, but I call it “time remapping.”
The time remapping effect is explained in detail in our article 高機能なモーション制作用JSライブラリGSAPを使ったタイムリマップ表現.
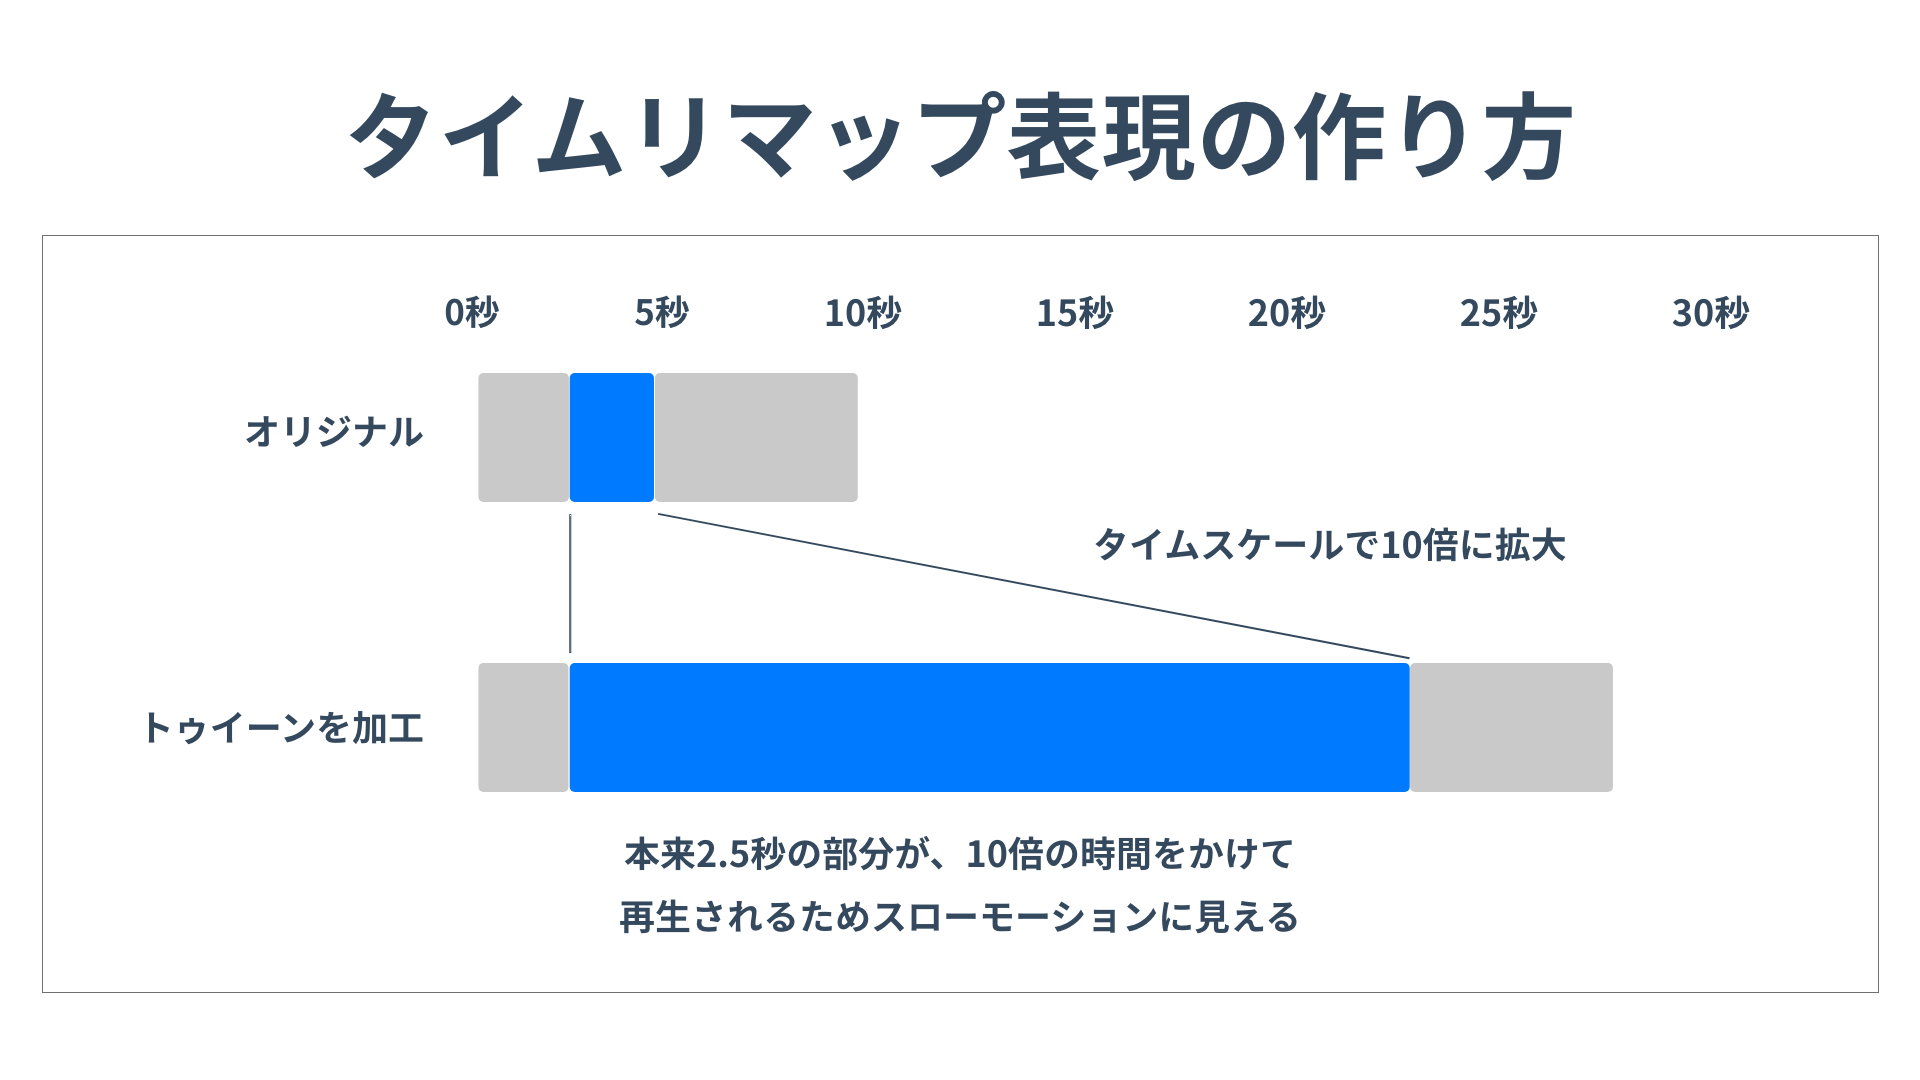
It may look somewhat similar to the tweenTo() method introduced earlier, but the control approach is different. The code style and flavor of the effect are also different, so feel free to choose whichever you prefer.
Conclusion
Timelines are essential for creating complex effects.
Next, Part 3 introduces scroll effects with ScrollTrigger. Complex scroll effects require timelines to coordinate multiple animations.