
Markdown is used in many situations, from writing blog posts to creating documentation. It is easy to format and easy to read, so there are plenty of opportunities to use it. But is your Markdown writing environment actually comfortable?
I often write documentation in Markdown with VS Code. While doing so, I sometimes find certain tasks inconvenient, hard to read, or difficult to use, such as creating and editing tables or checking the preview. To make the writing process smoother, I have tried various extensions and VS Code settings in my day-to-day work.
This article introduces the extensions and VS Code settings that I found useful. Everything from 1 to 5 is free to use, so try them out.
1. Create and edit Markdown tables easily with an extension
The extension I use most often for creating tables in VS Code is Markdown Table. It includes convenient features such as converting Excel tables into Markdown tables, moving between cells, and adding columns.
Convert an Excel table into a Markdown table
When a table has many columns, rows, or long text, I first organize the content in Excel, then copy and paste it into Markdown.
- Create a table in Excel.
- Select the range you want to copy, then copy it. Windows:
Ctrl+C; Mac:Command+C. - Paste it into the Markdown file. Windows:
Ctrl+V; Mac:Command+V. - With the pasted content selected, right-click it and choose “Markdown Table: Convert TSV to table”.
Move between cells
- Press
Tabto move to the next cell. - Press
Shift+Tabto move to the previous cell.
Add a column
- Place the cursor in a cell, then right-click it.
- Choose “Markdown Table: Insert column to right” or “Markdown Table: Insert column to left” to add a column on either side.
Add a snippet to insert tables quickly
You can use VS Code snippets to insert a table quickly.
Prepare the snippet
- In VS Code, select Code > Settings > Configure Snippets.
- Type
markdown, then selectmarkdown.json. - Copy and paste the snippet below, then save the file.
"Insert a simple table": {
    "prefix": "table",
    "body": [
        "| ${0:title} |  |",
        "| - | - |",
        "|   |   |"
    ],
    "description": "Insert a simple table"
}
Enable the snippet
Because this snippet is useful across projects, adding it to User Settings is recommended. To use it only in a specific project, you can add it to Workspace Settings instead.
- Open the Command Palette. Windows:
Ctrl+Shift+P; Mac:Command+Shift+P. - Type
user settings, then select “Preferences: Open User Settings (JSON)”.- To add it to Workspace Settings instead, type
workspace settings, then select “Preferences: Open Workspace Settings (JSON)”.
- To add it to Workspace Settings instead, type
- Add the following setting.
"[markdown]": {
    "editor.quickSuggestions": true,
},
How to use it
- Type
tablein a Markdown file. - Select “table Insert a simple table”.
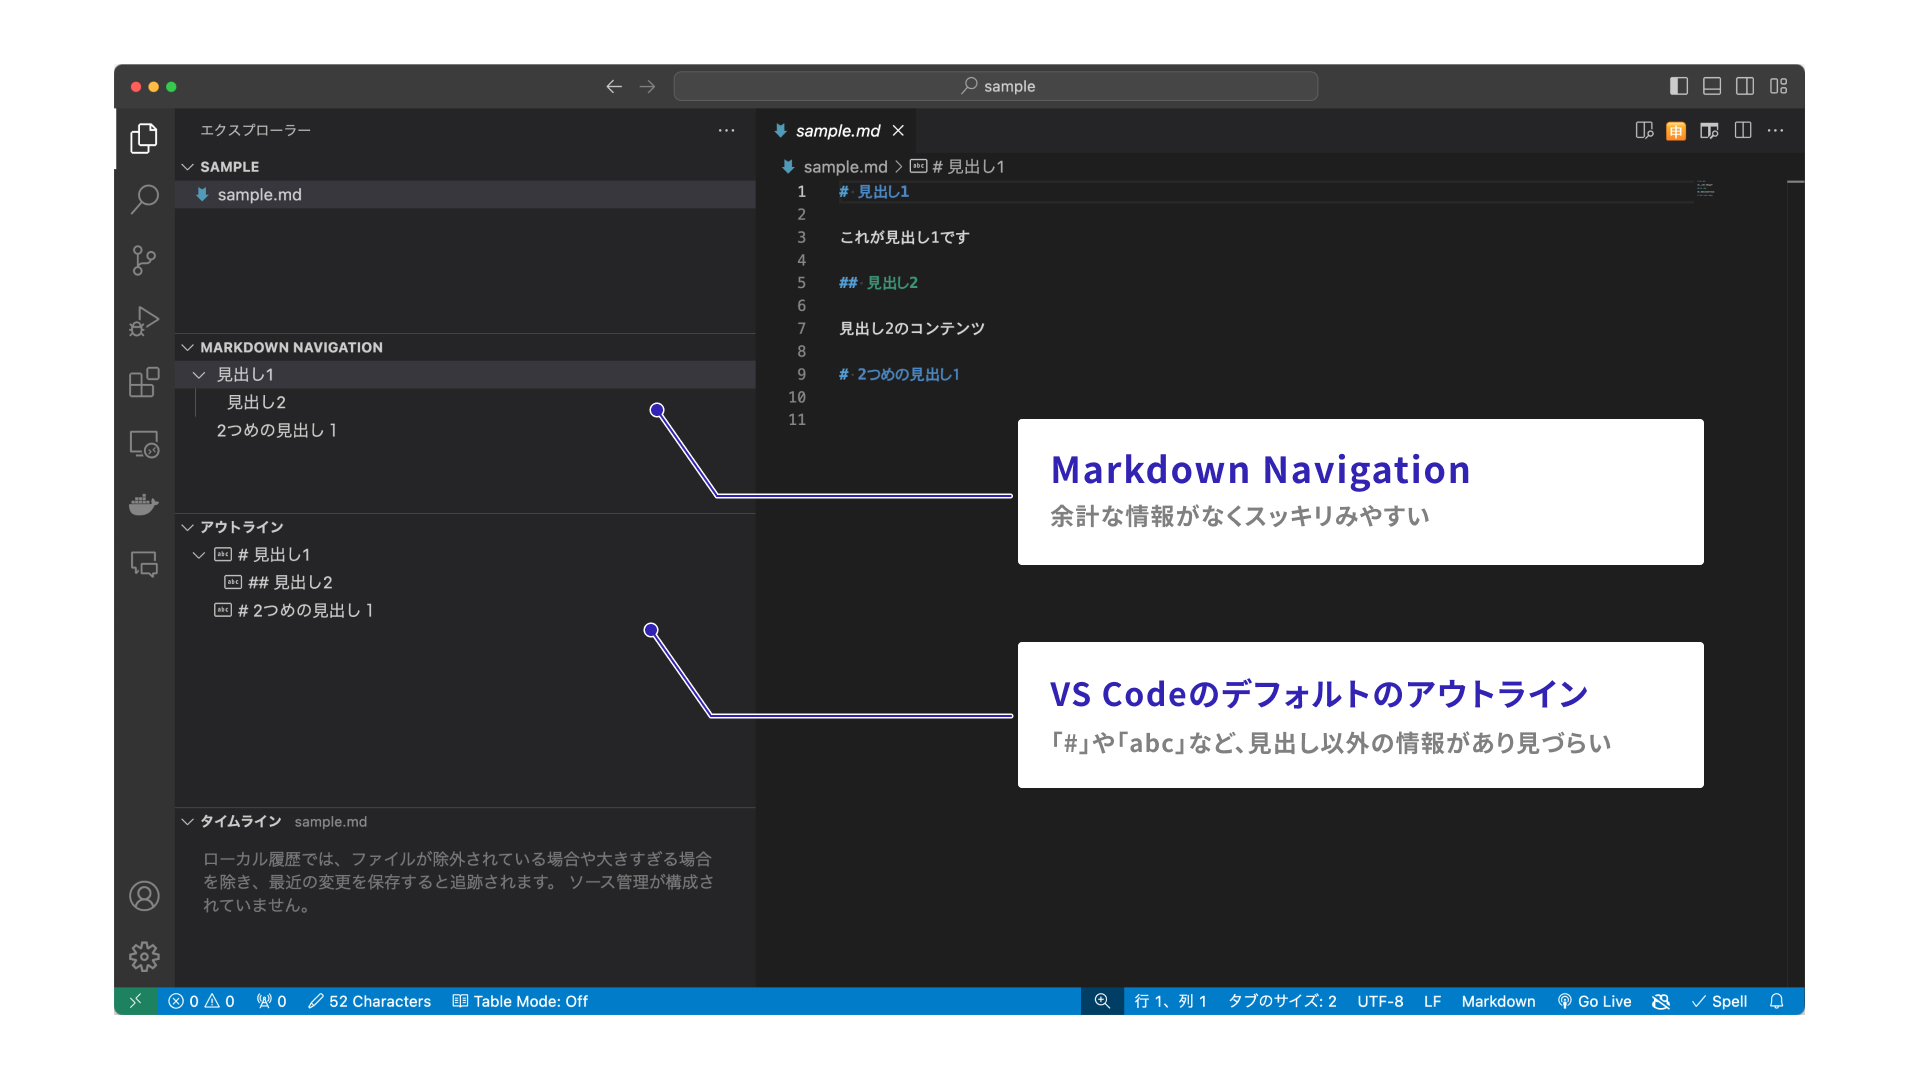
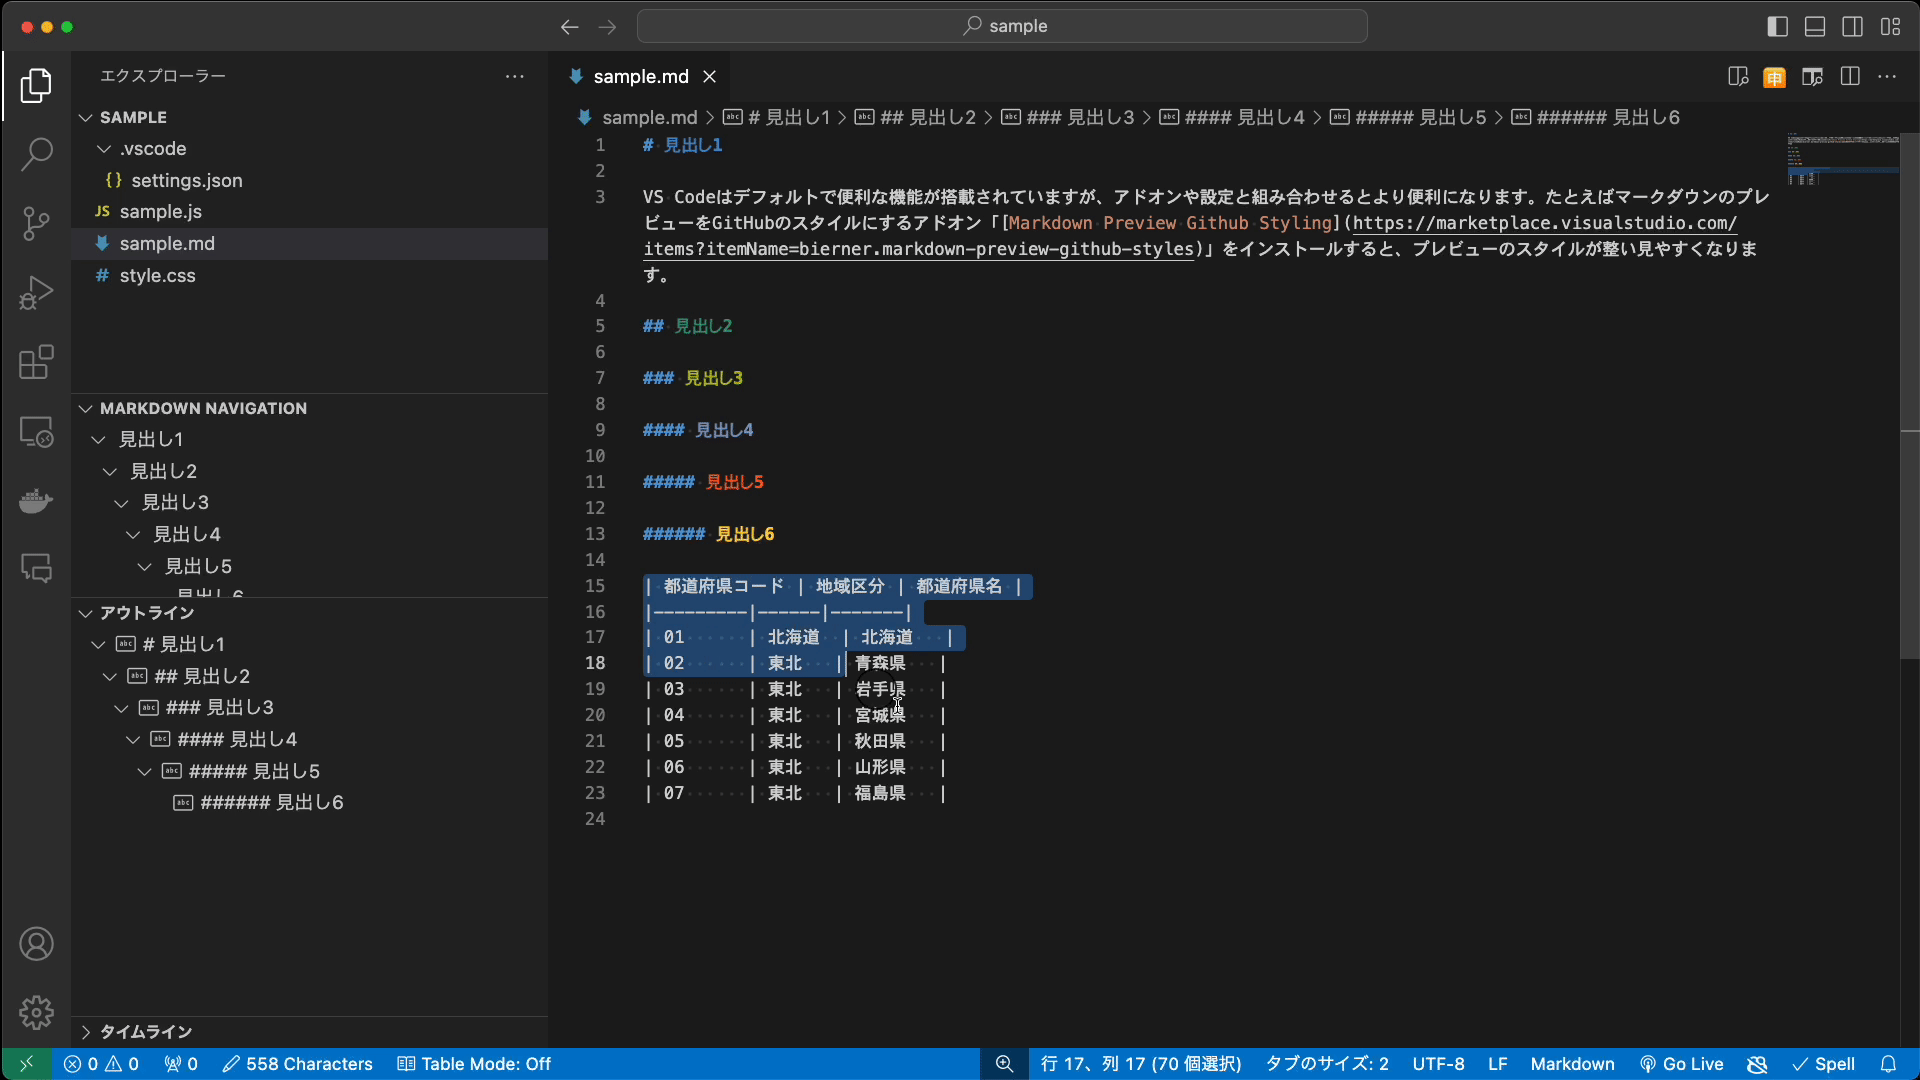
2. Show Markdown navigation with an extension
By default, VS Code displays Markdown headings in the Outline view. This is useful enough, but I find it a little hard to read because it includes extra information such as # and abc.
Markdown Navigation is an extension with a simple, readable display. It is a subtle improvement, but it is surprisingly effective, so give it a try in your own environment.
How to use it
- Install the extension.
- Open a Markdown file, and the “MARKDOWN NAVIGATION” view will appear.
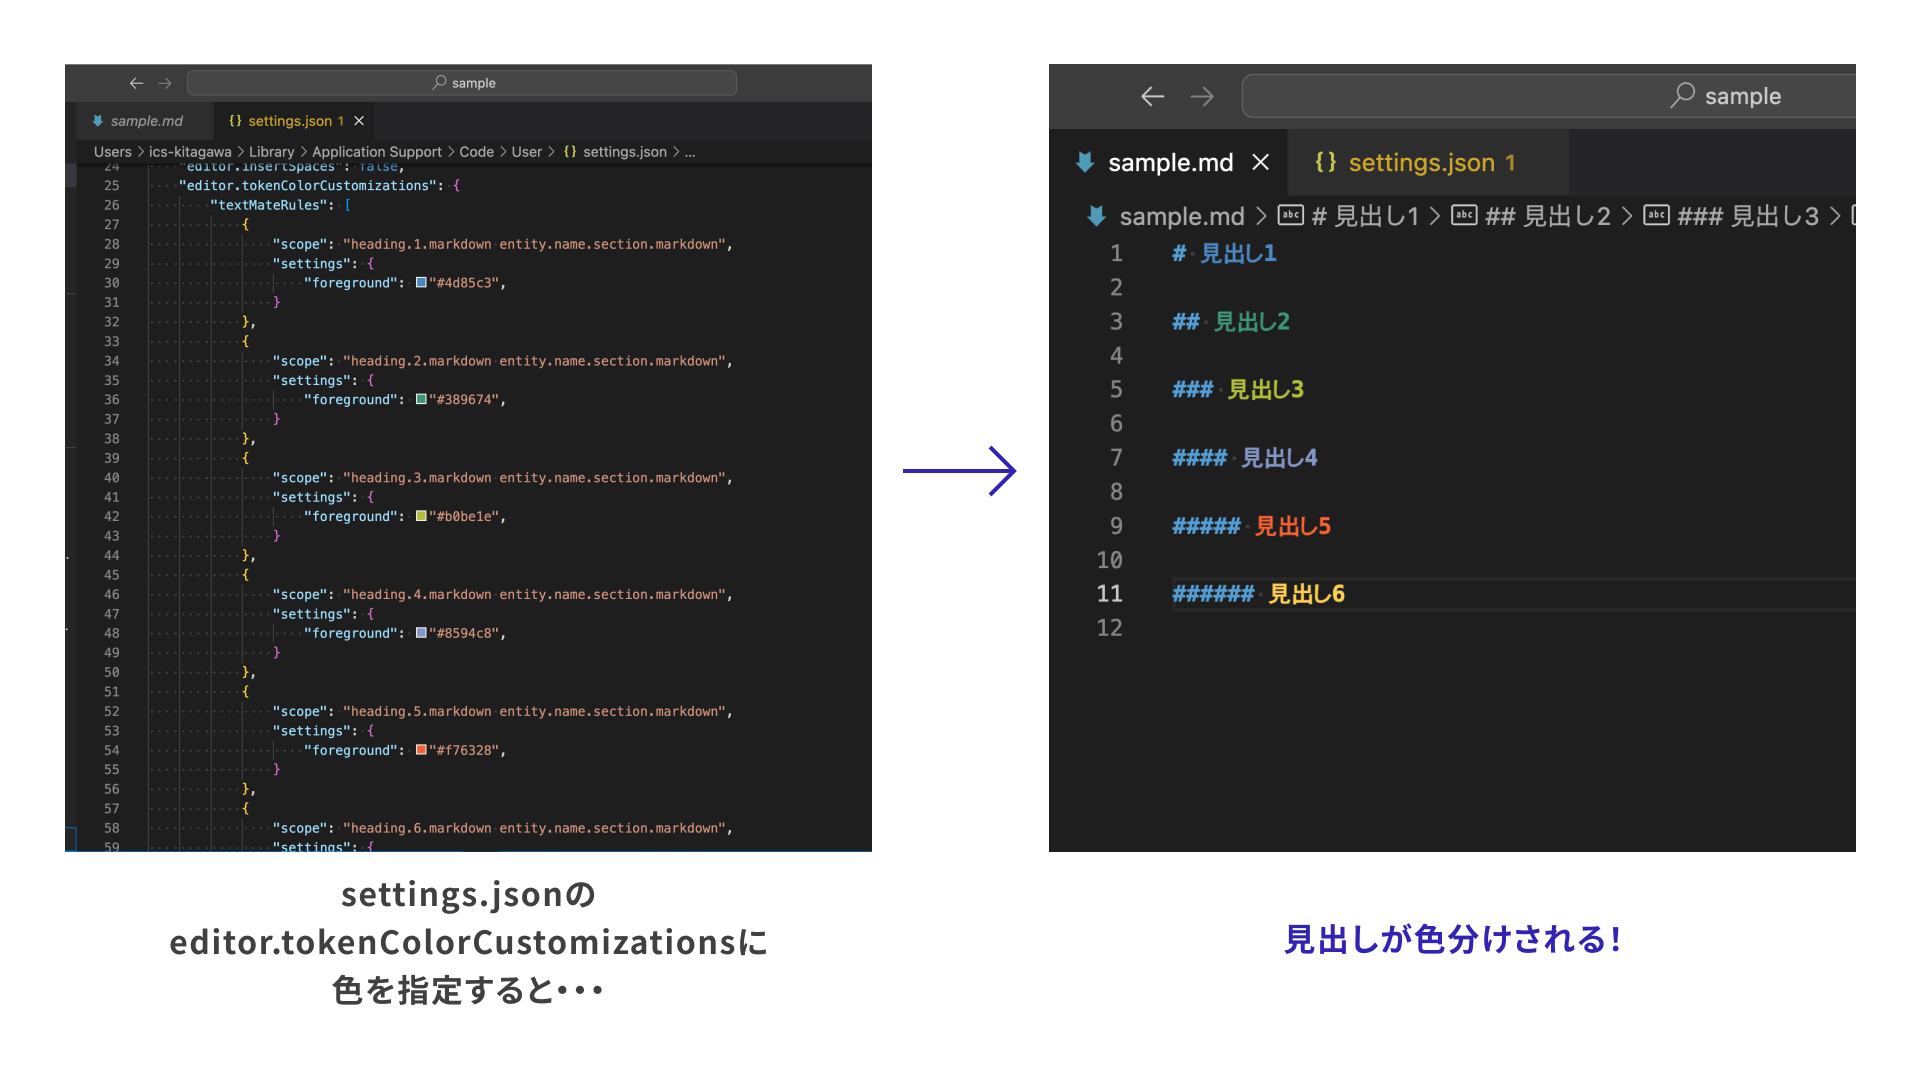
3. Set different colors for heading levels
You can configure the display colors for Markdown headings such as # and ##. This makes it easy to identify heading levels at a glance, catch mistakes quickly, and understand the structure of the document.
How to use it
- Open the Command Palette. Windows:
Ctrl+Shift+P; Mac:Command+Shift+P. - Type
settings, then open “Preferences: Open User Settings (JSON)”.- To add this to Workspace Settings instead, type
workspace settings, then select “Preferences: Open Workspace Settings (JSON)”.
- To add this to Workspace Settings instead, type
- Set the colors as shown below.
{
  "editor.tokenColorCustomizations": {
    "textMateRules": [
      {
        // Heading level 1
        "scope": "heading.1.markdown entity.name.section.markdown",
        "settings": {
          // Set any color here
          "foreground": "#4d85c3",
        }
      },
      // Configure heading level 2 and below in the same way
    ]
  },
}
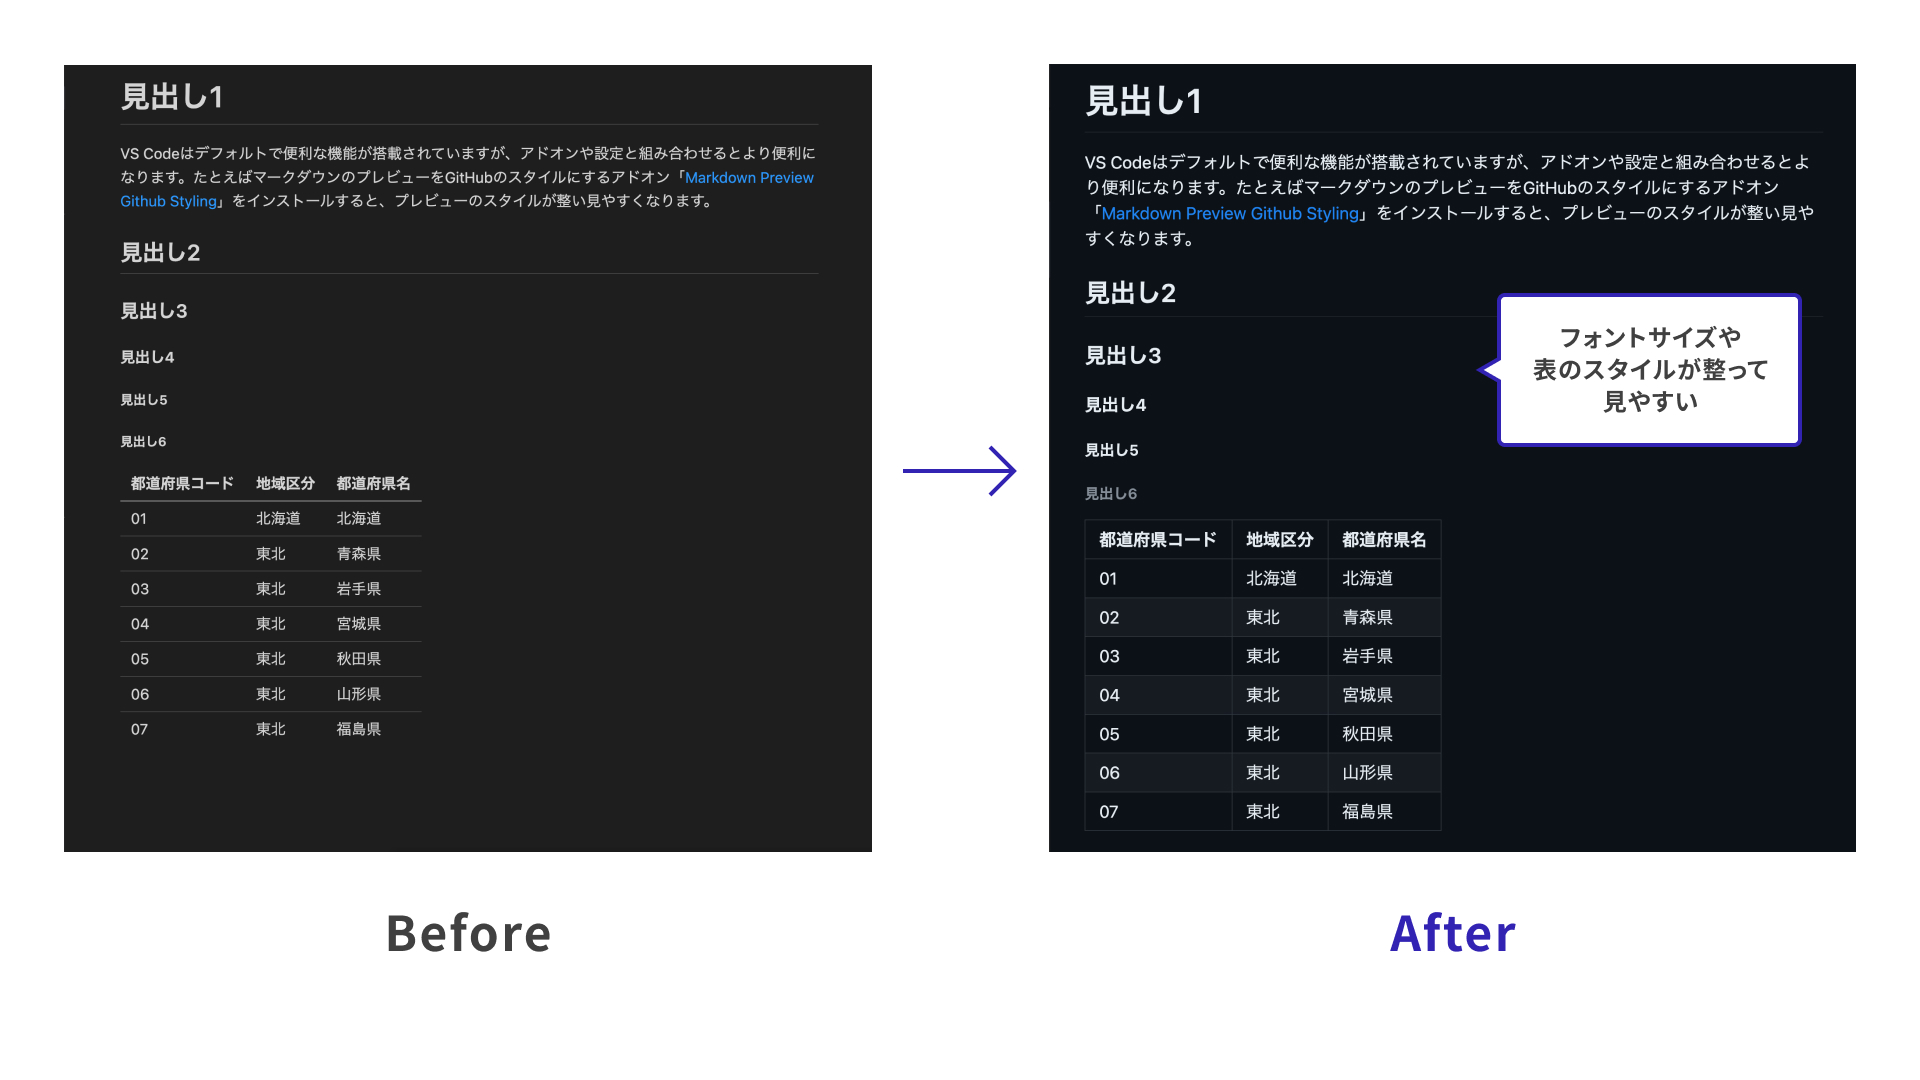
4. Improve the Markdown preview with an extension
Markdown Preview Github Styling is an extension that changes the Markdown preview to a GitHub-style appearance.
It improves the preview by adjusting the font size, line height, table styling, and other visual details. There are several extensions for styling Markdown previews, so install whichever one looks useful for your workflow.
How to use it
- Install the extension.
- Reopen VS Code.
Similar extensions
5. Customize the Markdown preview with CSS
If you want to customize the Markdown preview in your own style, you can write CSS and specify that file in your settings.
This is useful when you want to make small adjustments after improving the overall appearance with the extension introduced in section 4. I set the heading colors in the Markdown preview to match the heading colors in the editor, which makes checking and editing more efficient.
How to use it
- Create a CSS file with your styles and place it anywhere you like. In the example below, the file is placed in the project root.
- Type
workspace settings, then select “Preferences: Open Workspace Settings (JSON)”. - Specify the CSS file path in
markdown.stylesinsettings.json.
{
  "markdown.styles": ["style.css"],
}
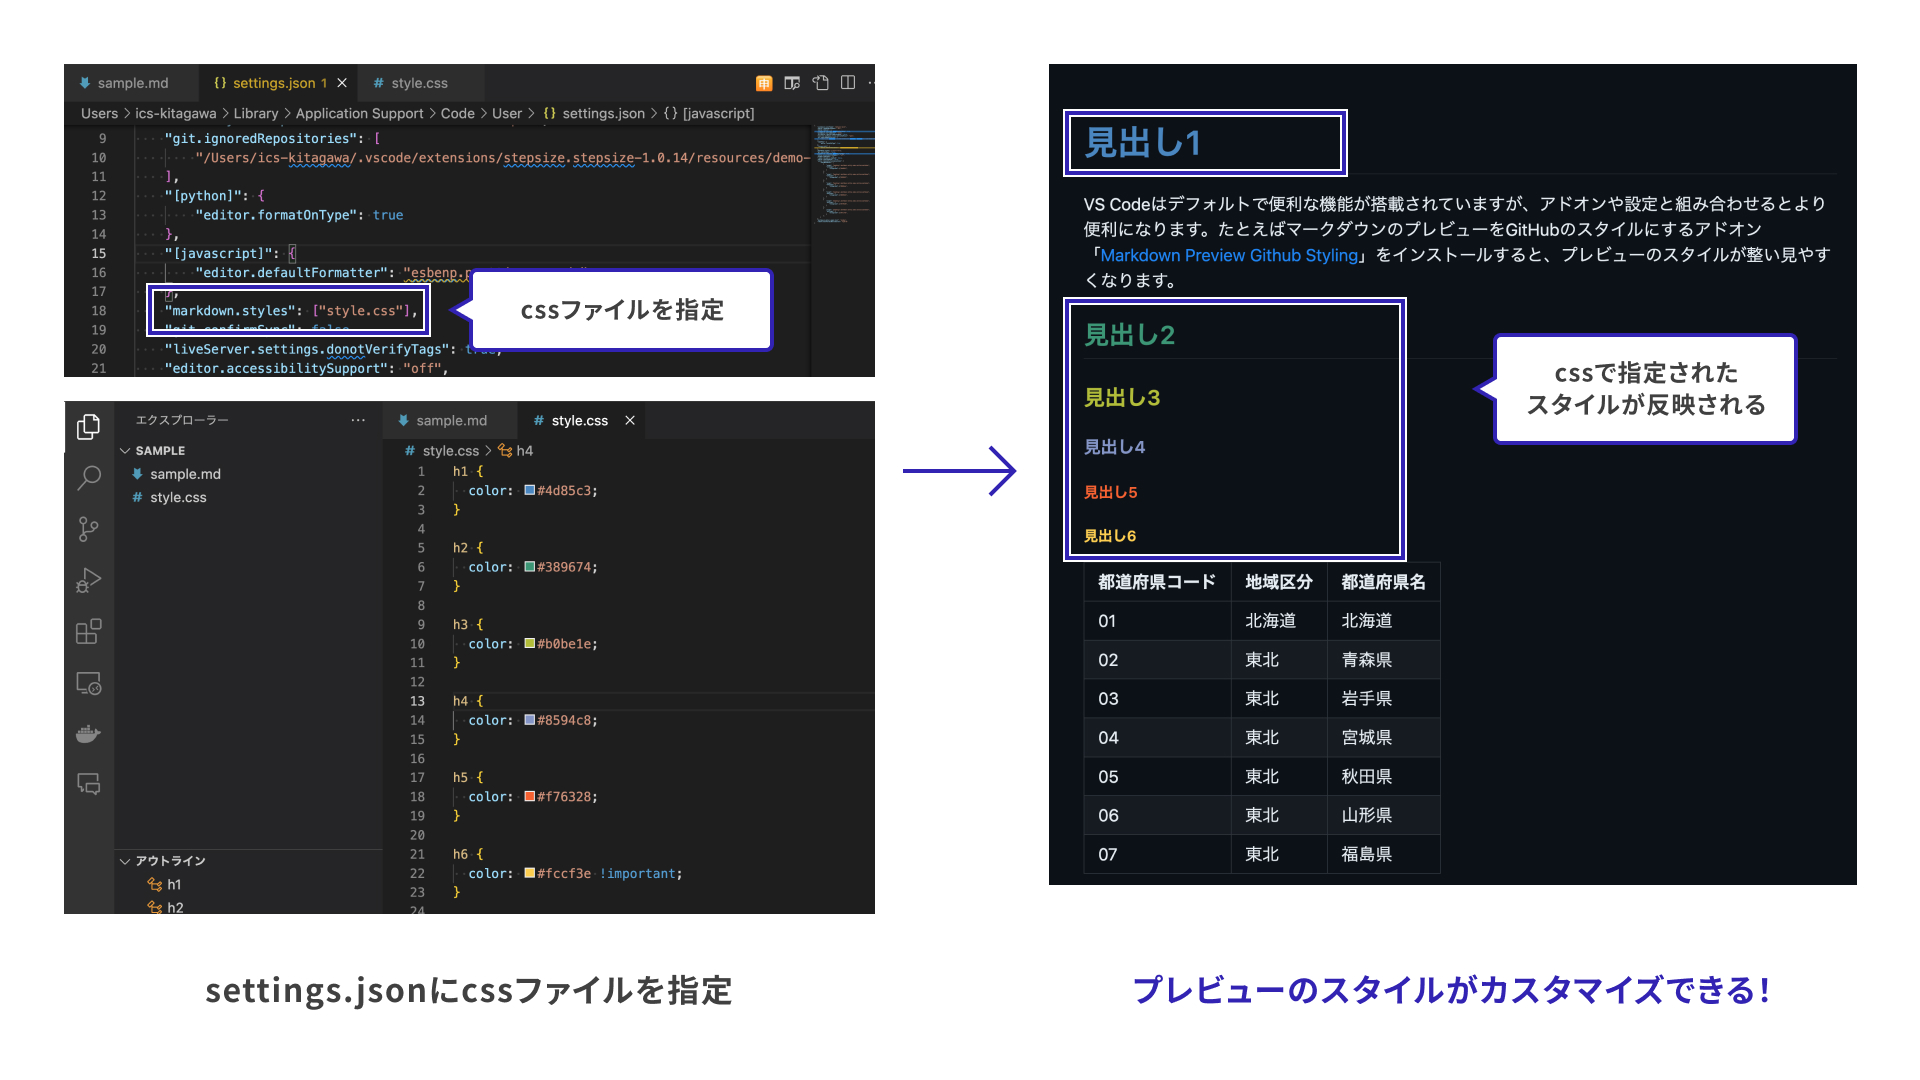
If you place the CSS file in the project root, using Workspace Settings is recommended. If you add this setting to User Settings, VS Code may show a warning in other projects because it cannot find the CSS file.
Bonus: let AI handle Markdown edits
As coding agents become more common, there are more cases where Markdown is written with AI as well. With an agent, you can make flexible requests, such as converting a table into paragraph-based text. I often ask AI to handle edits that look tedious to do manually.
One coding agent provided by GitHub is GitHub Copilot. Here is an example using Copilot.
How to use it
- Install GitHub Copilot and authenticate it. For details, see the official documentation.
- Select the part you want to change.
- Open inline chat with the shortcut. Windows:
Ctrl+I; Mac:Command+I. - Enter what you want to do in the chat.
Conclusion
Did any of the extensions or settings introduced here look useful? Use extensions and settings to reduce small annoyances and readability issues, and tune your development environment to fit your own preferences.